Setup Signature
Complete E-Signature Setup
Add the Signature Ledger to the Navbar
Before starting this process, we recommend adding the Signature Ledger to the Navbar so you can easily monitor the progress of your signature processes.
- Go to My Account then click on Company .
- On the left, scroll down and select Apps/Portal, then the Navigation Menu (1) tab.
- Choose the Group where you want the Signature Navbar to appear.
In the Available Tabs section, scroll down to find Signatures (2).
Click on Add (3) to move it to the Visible Tabs section, adding it to the Navbar. - Click the Save button to save your preferences.
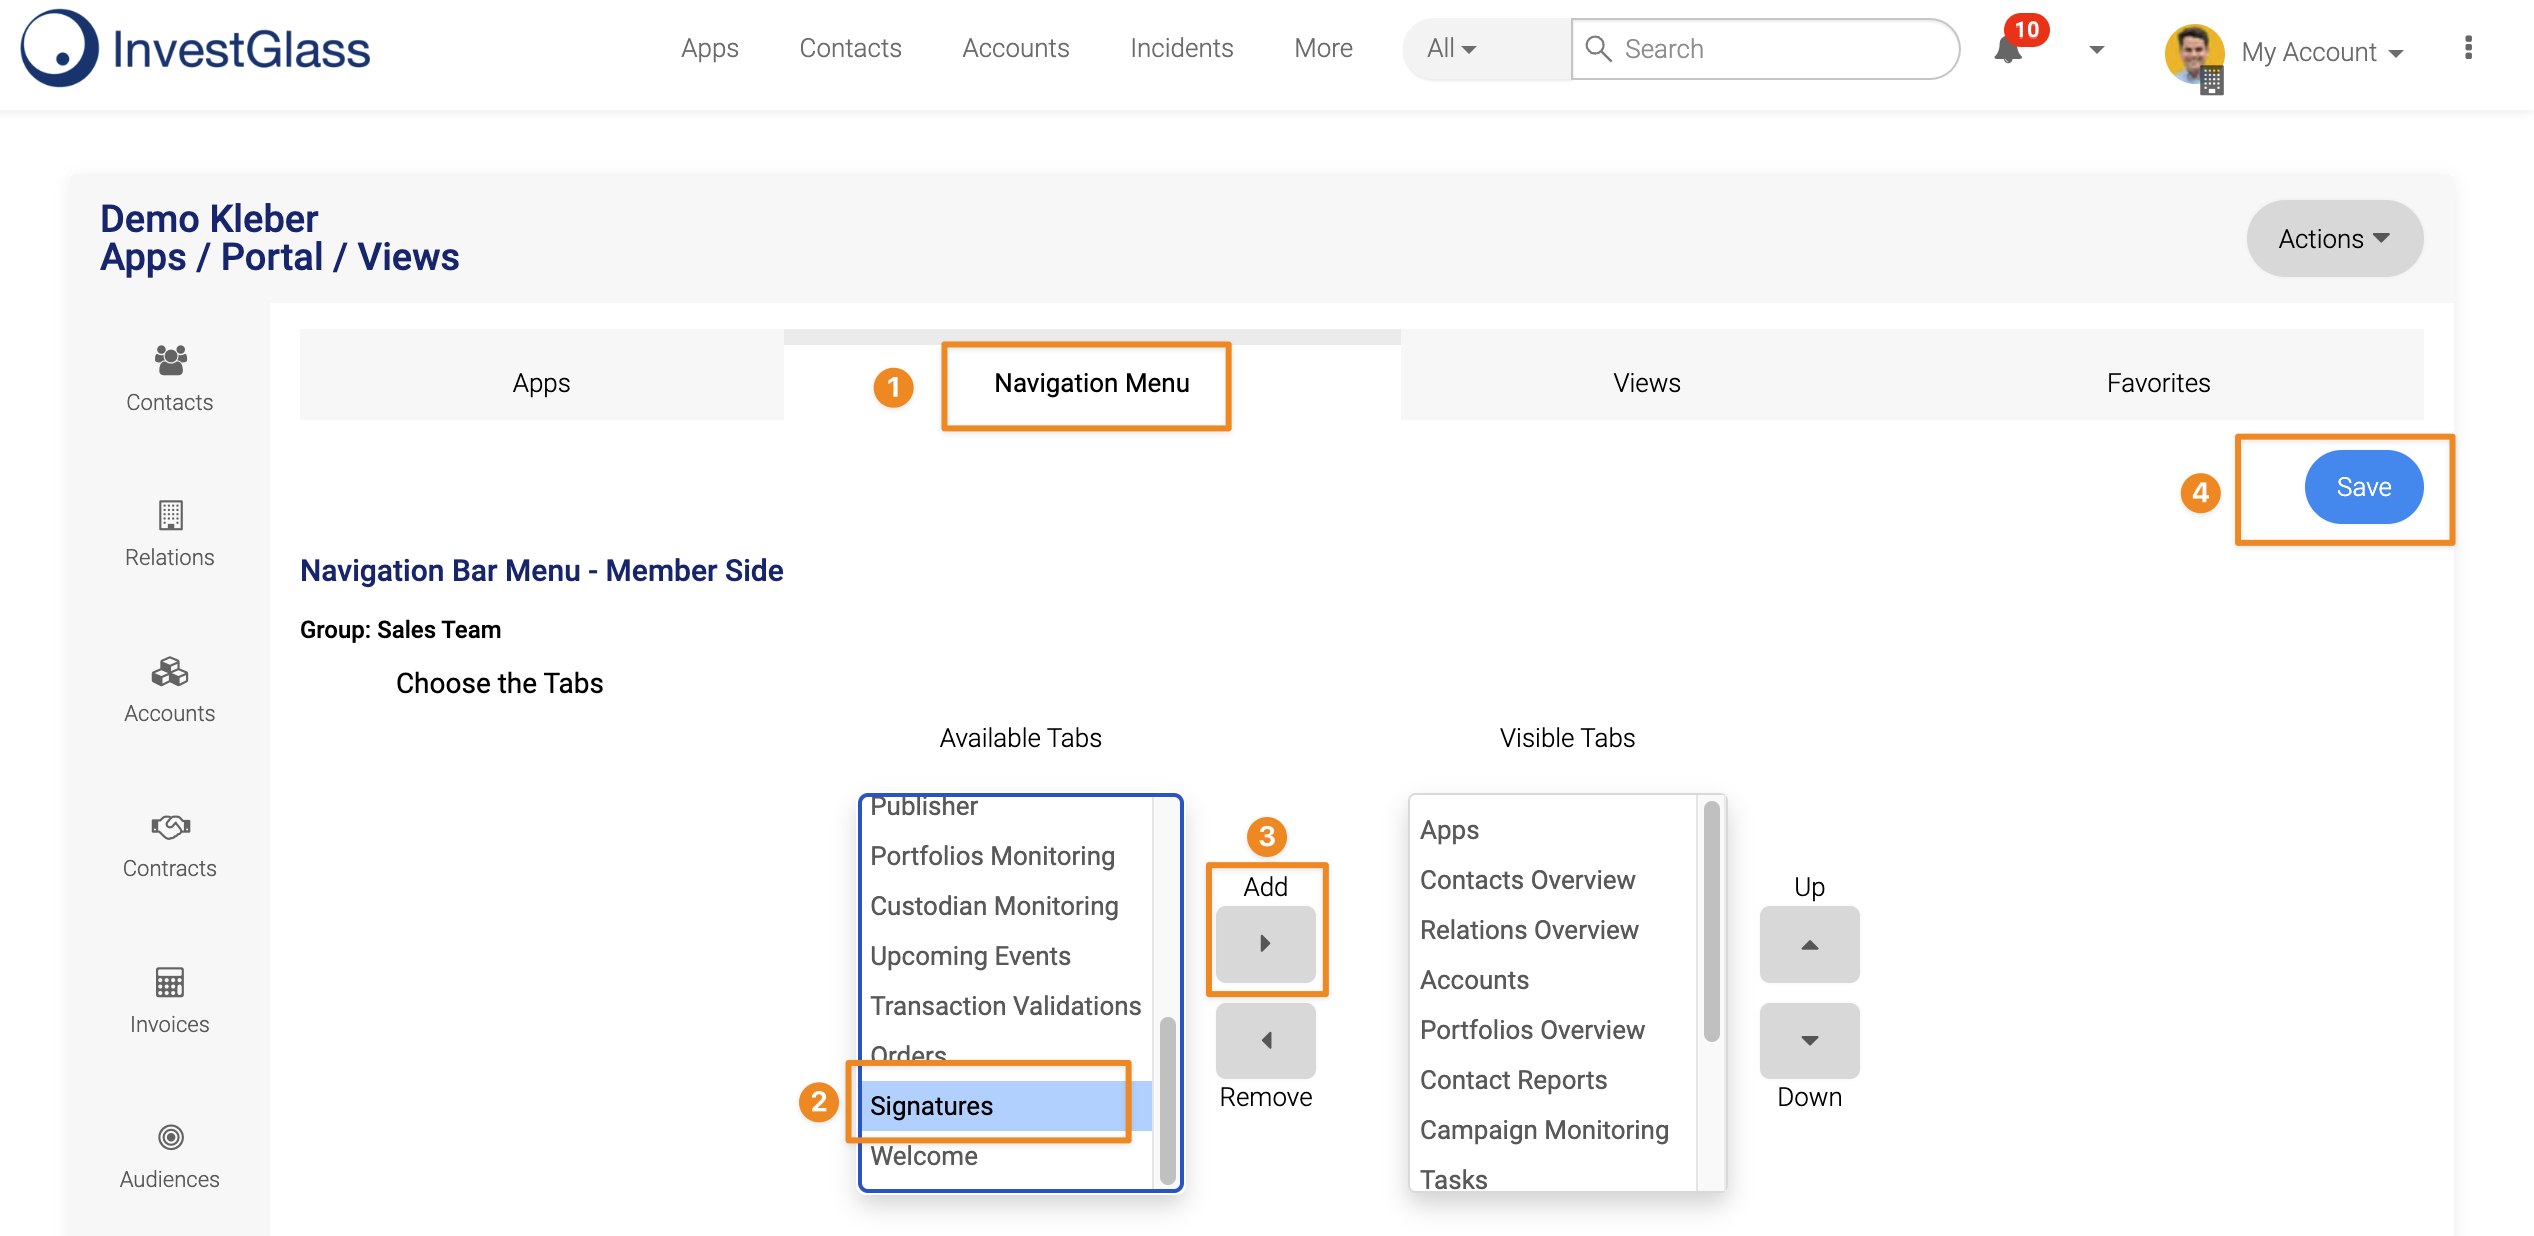
Remember : You can set the position of the signature page by clicking the up and down arrows.
Don’t forget to click save.
E-Signature Options
You can customise the communication sent to your customers during the e-signature process.
- Go to My Account, then click on Company .
- On the left, scroll and select Settings.
- Under the General Tab, scroll down to the E-signature section.
This page is crucial as it determines which e-signature process is enabled and which email templates are used to request signatures from your contacts. The following options are available:
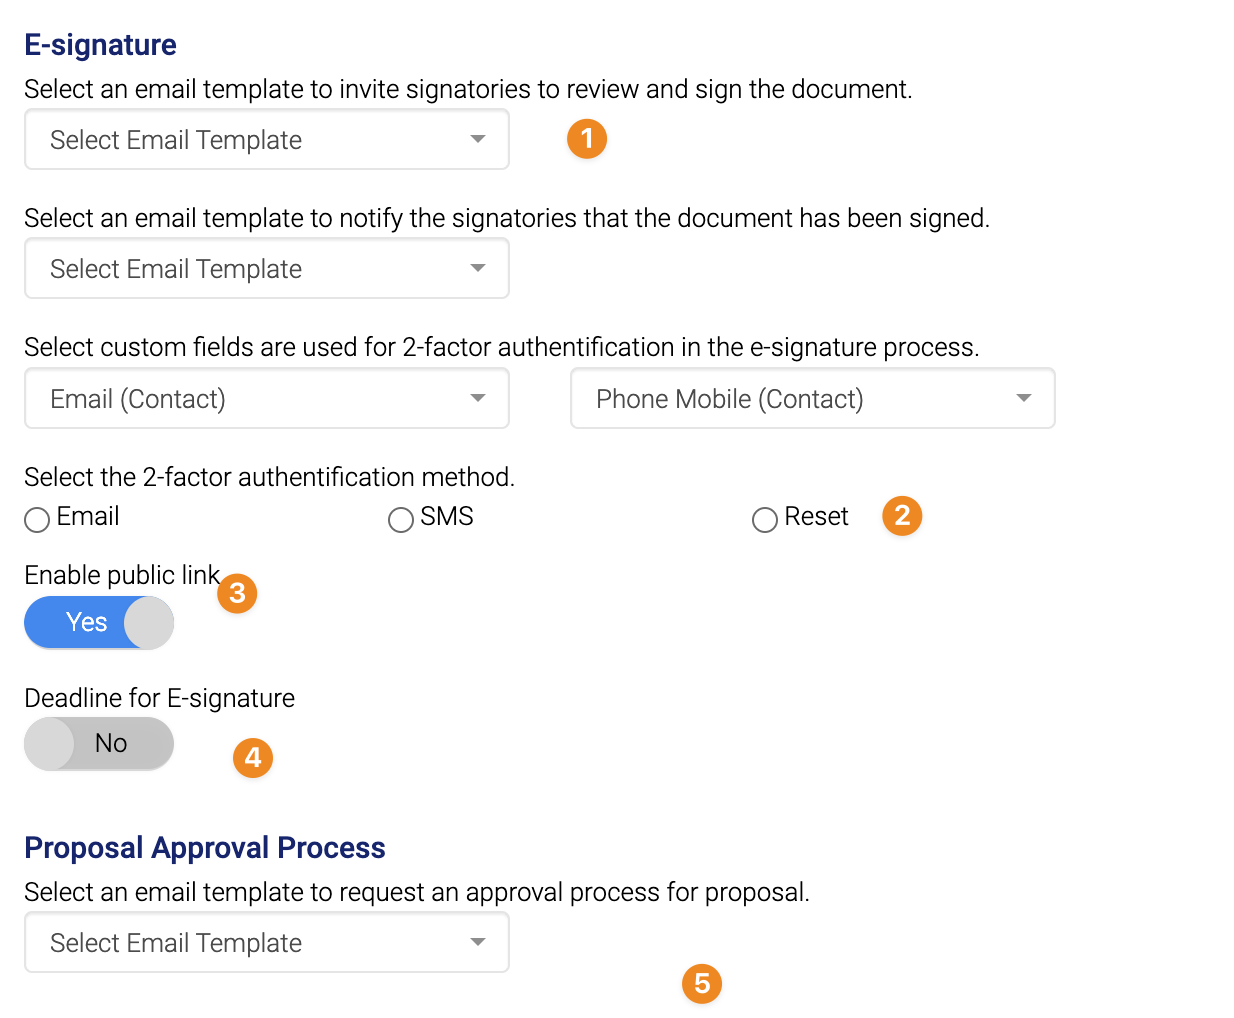
2FA methodThis method validates the document signature process (PDF loaded in the CRM). Another 2FA process is used when validating Forms. To use the 2FA validation process, go to the Password tab to set the 2FA.
Option 1 - Invite Signatories to Review and Sign the document
For this option, select the email template you want to use to invite signatories to review and sign the document. You can also select another template to notify the signatories once the document has been signed.
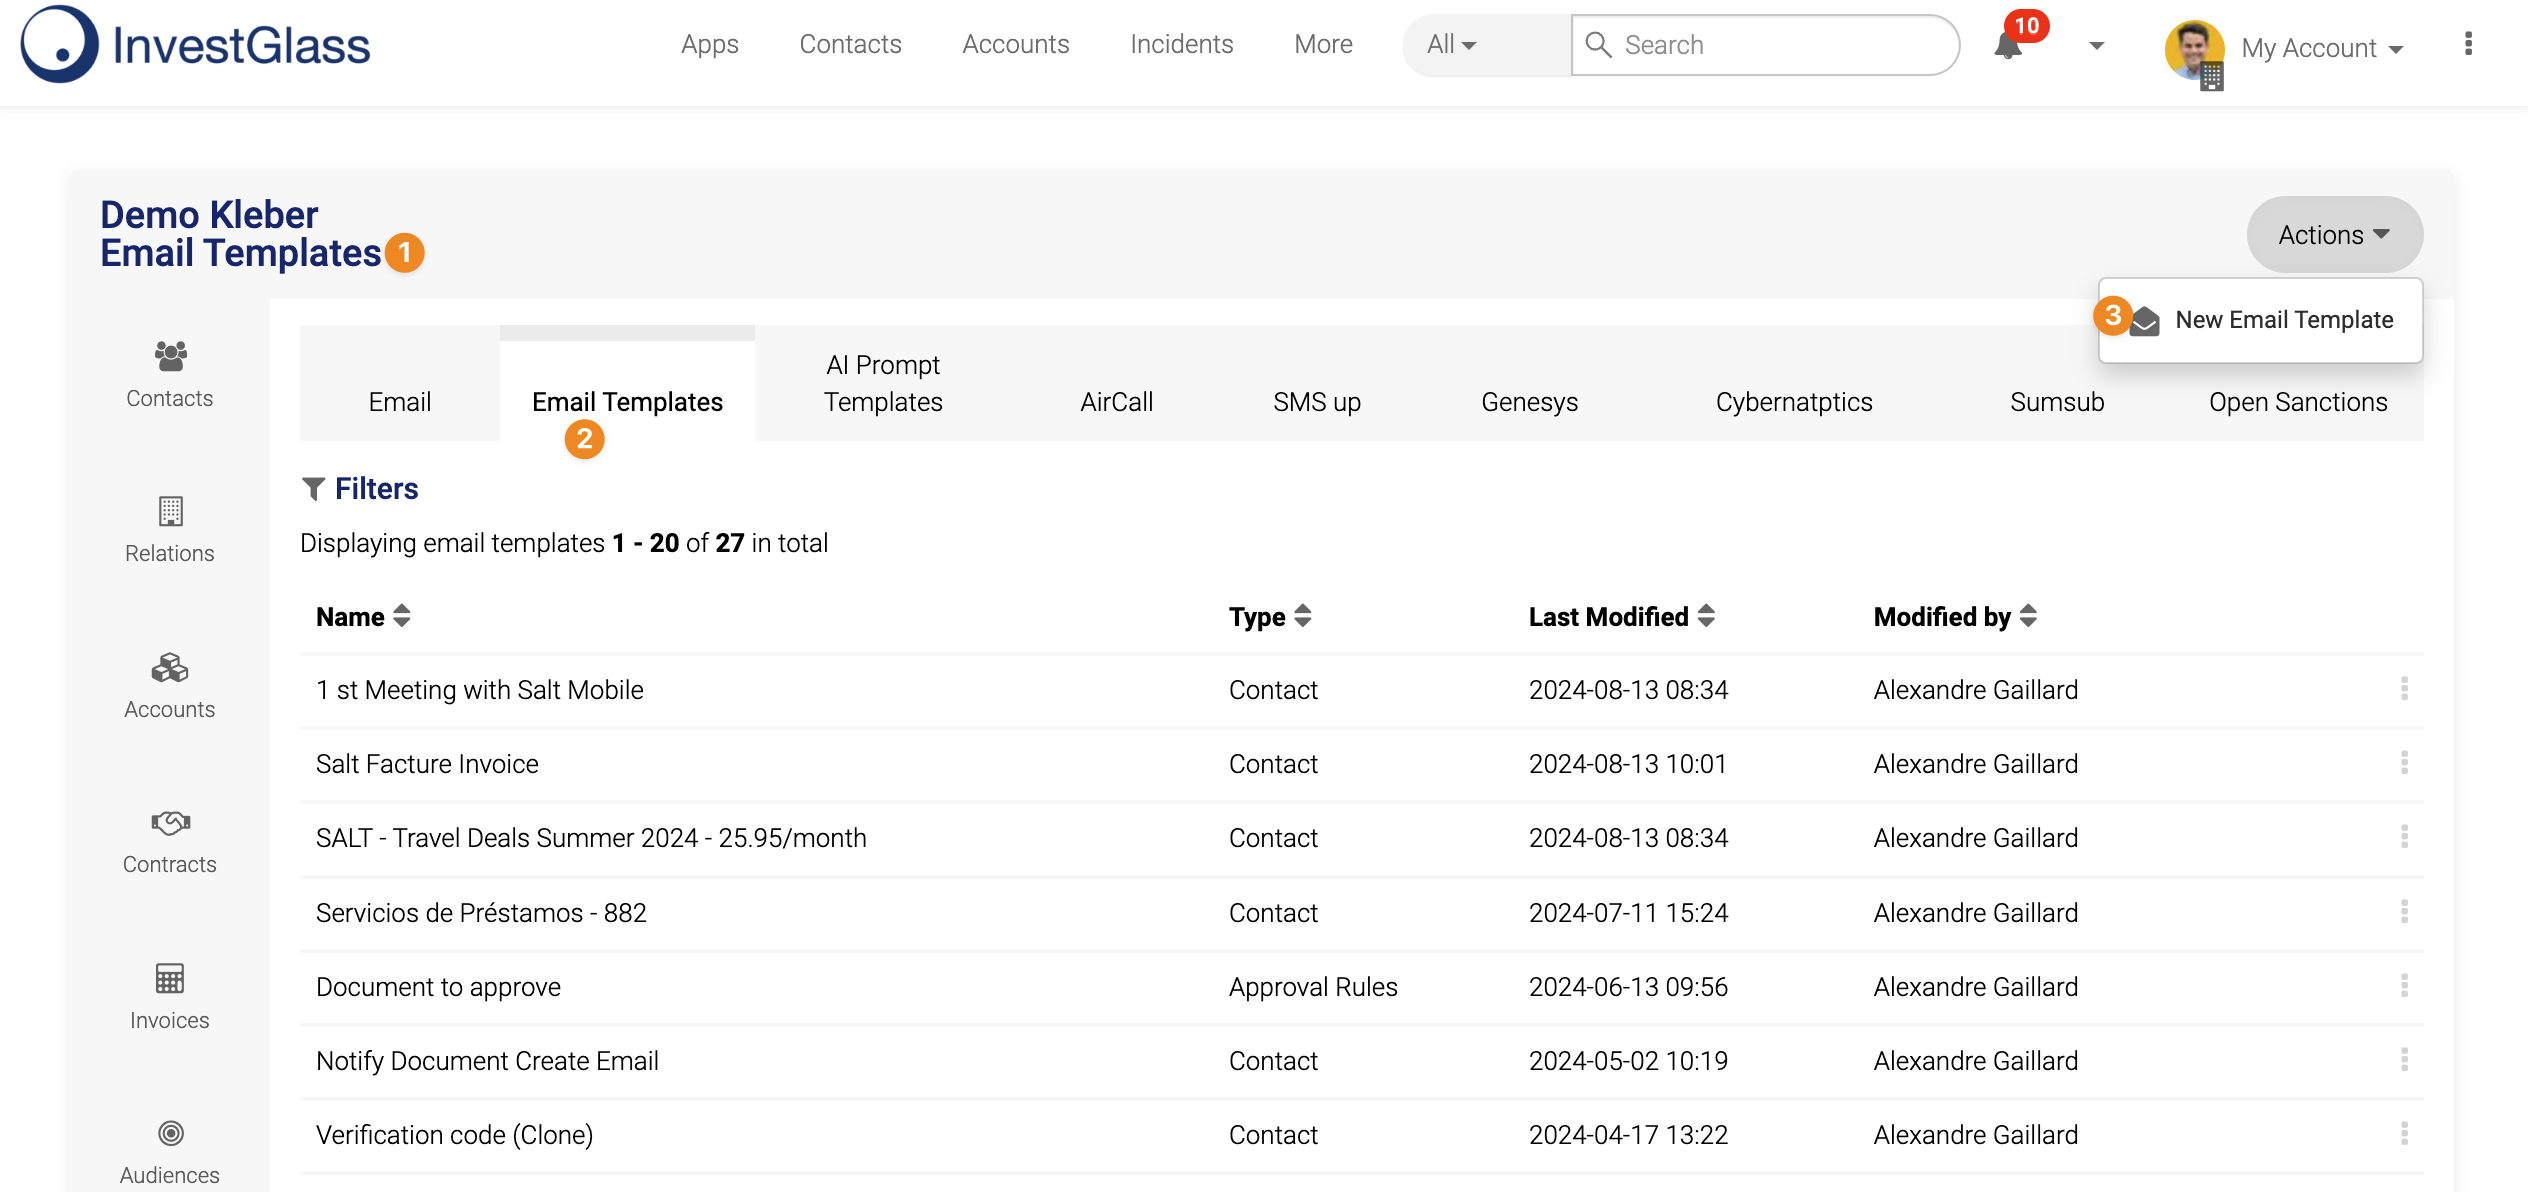
Optional: To create a new email template:
- Go to My Account, then click on Company .
- On the left, select the Communication tab.
- Click on the Email Templates (2) tab.
- Click Actions, then select New Email Template.
Option 2 - 2FA Signature Setup
This section allows you to configure the two-factor authentication (2FA) options for added security during the signing process.
You can specify which email (contact) or mobile number should receive the 2FA code.

Choose the 2FA method (email or SMS) based on your needs:
- For 2FA via SMS, ensure that SMS notifications are enabled.
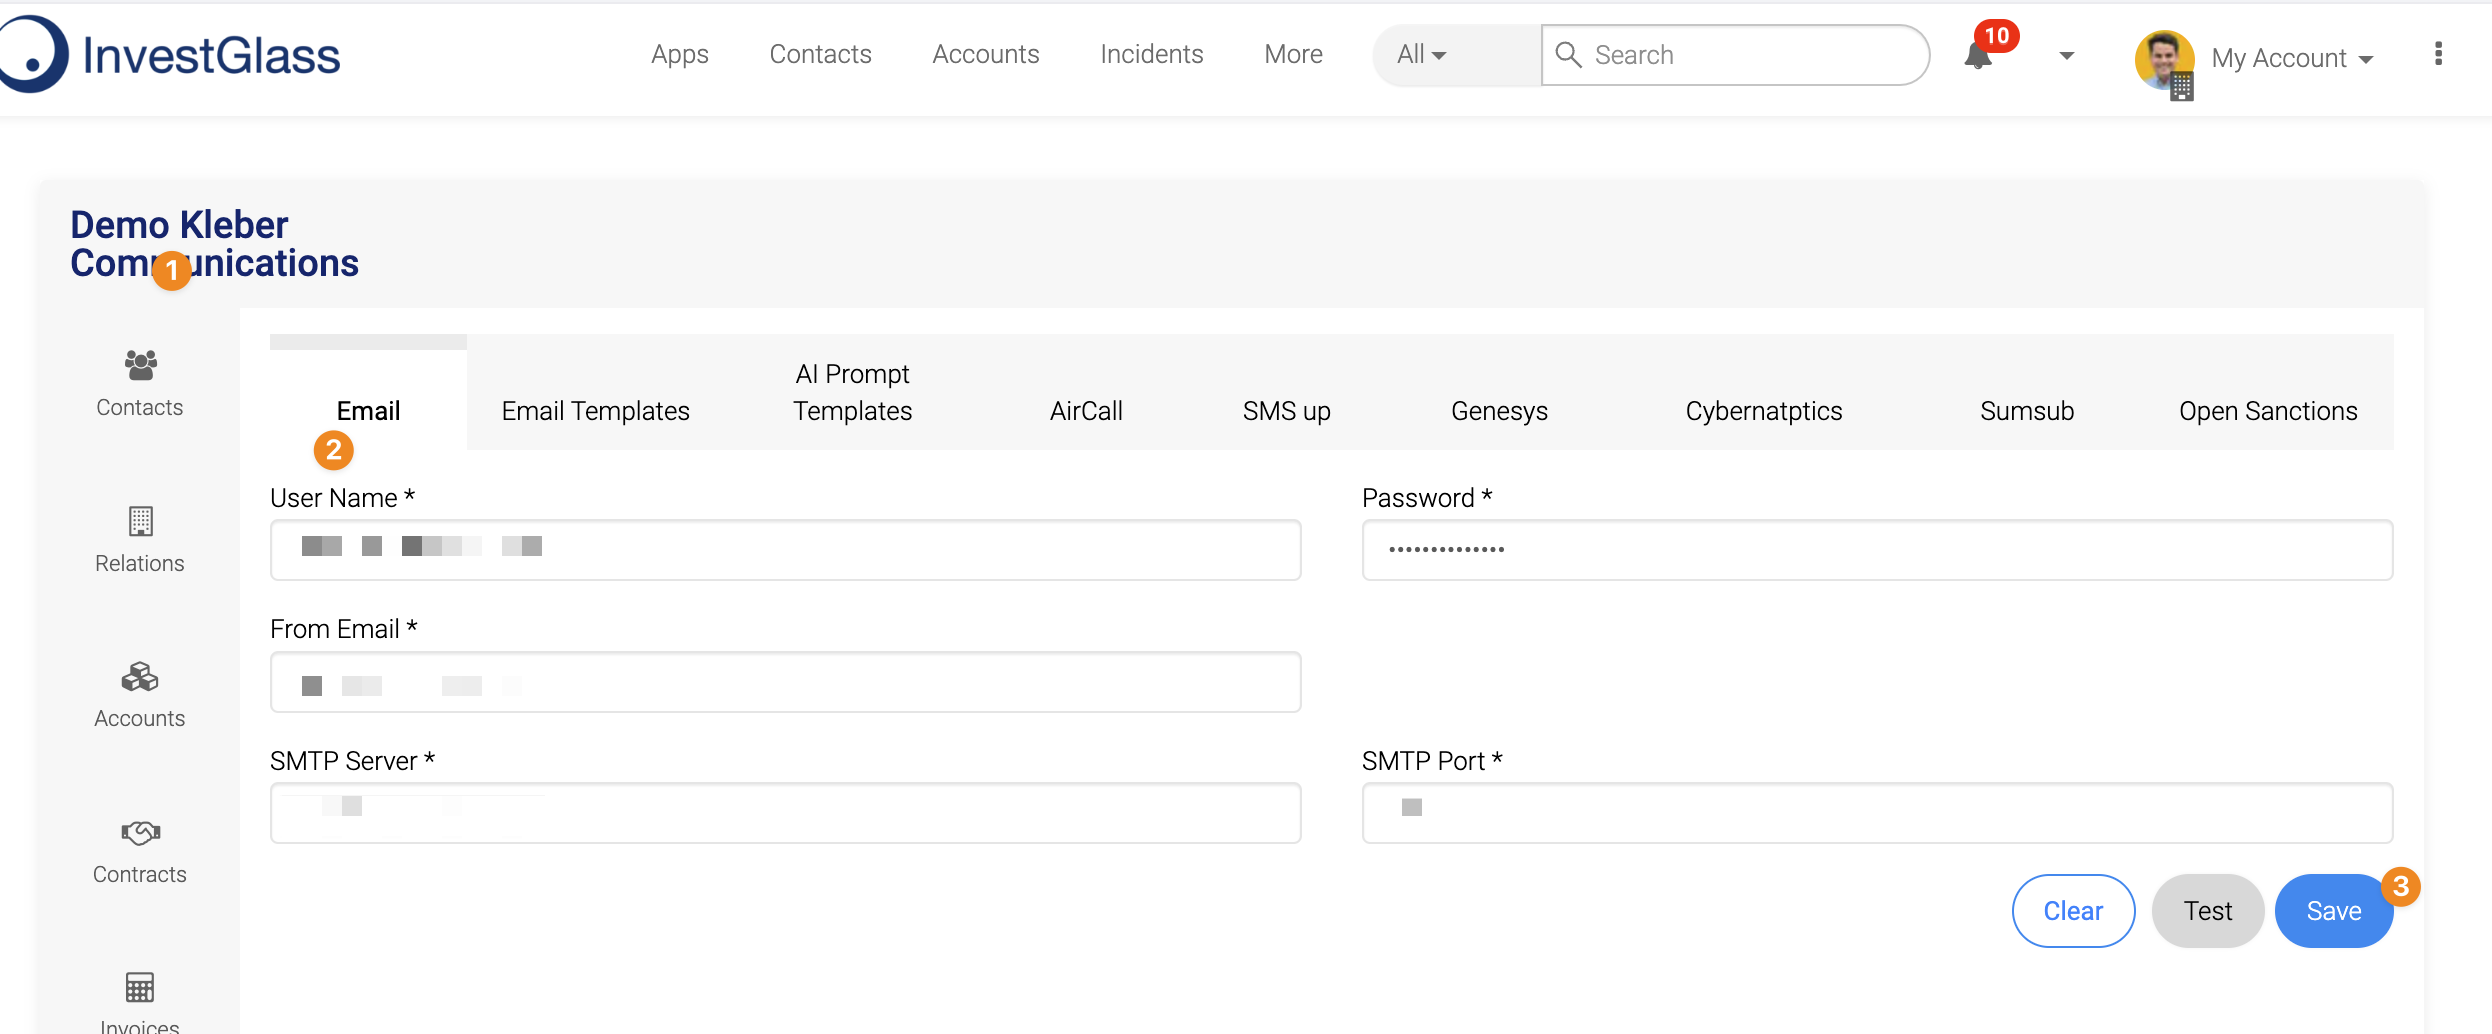
- For 2FA via Email, make sure the email option is selected and that the communication settings are correctly configured under Communication.
To do this, go to My Account, then Company .
On the left, scroll down and select Communication, then the First Email tab.
Option 3 - Public Link
The Public link (3) option can be disabled if you wish to restrict document sharing exclusively to portal access.

Option 4 - Deadlines for E-Signature
You can optionally set a Deadline (4) for e-signature processes. Enabling this option allows you to set a time limit after which the signature process will be disabled if not completed.

Option 5 - Proposal Approval Process
You can set a different Email Template (5) for sending to your contact, inviting them to sign proposals.
This template can also be modified in the Communication Template settings.

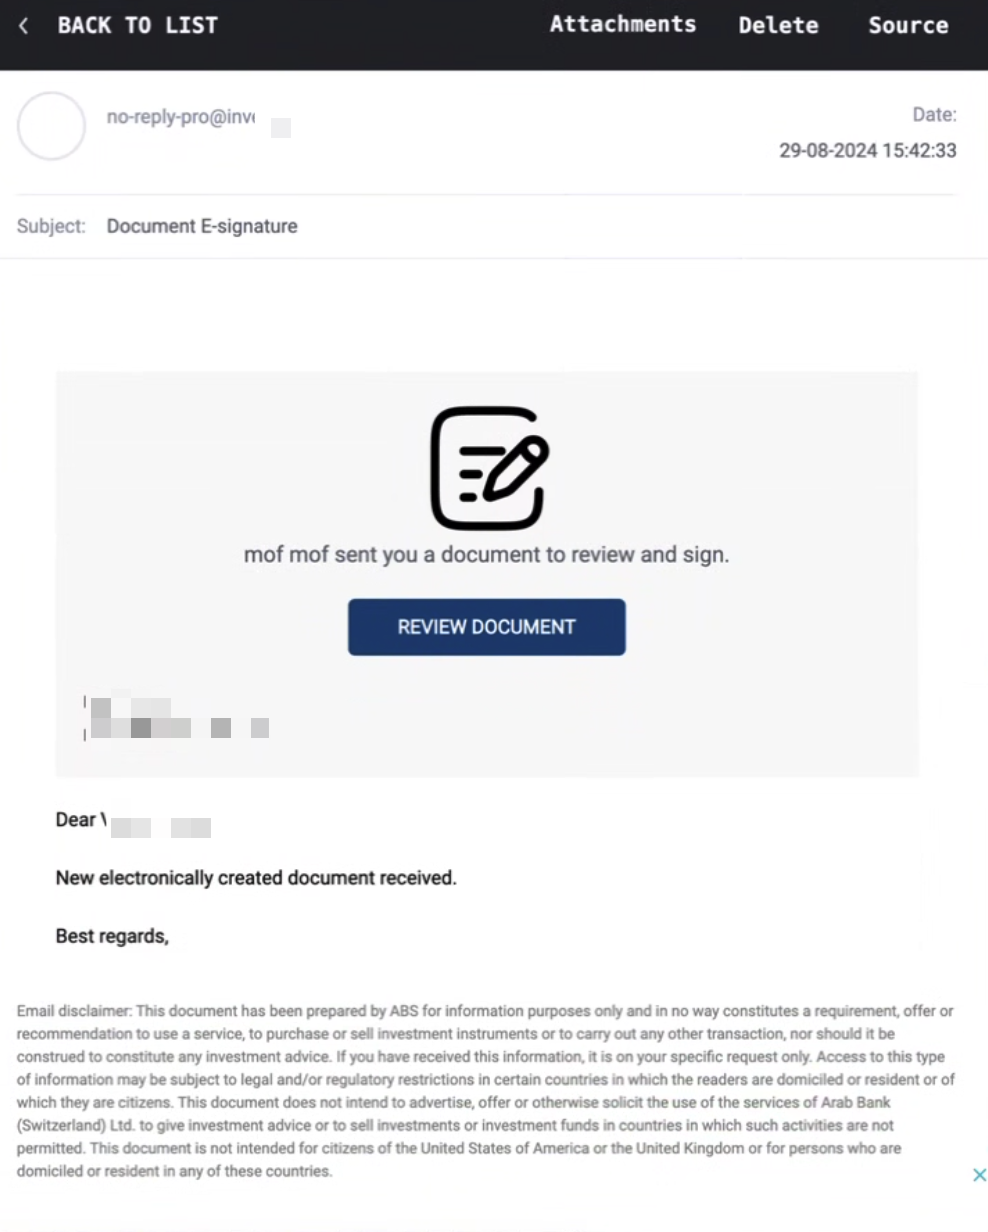
Terms of Service and Disclaimer Setup
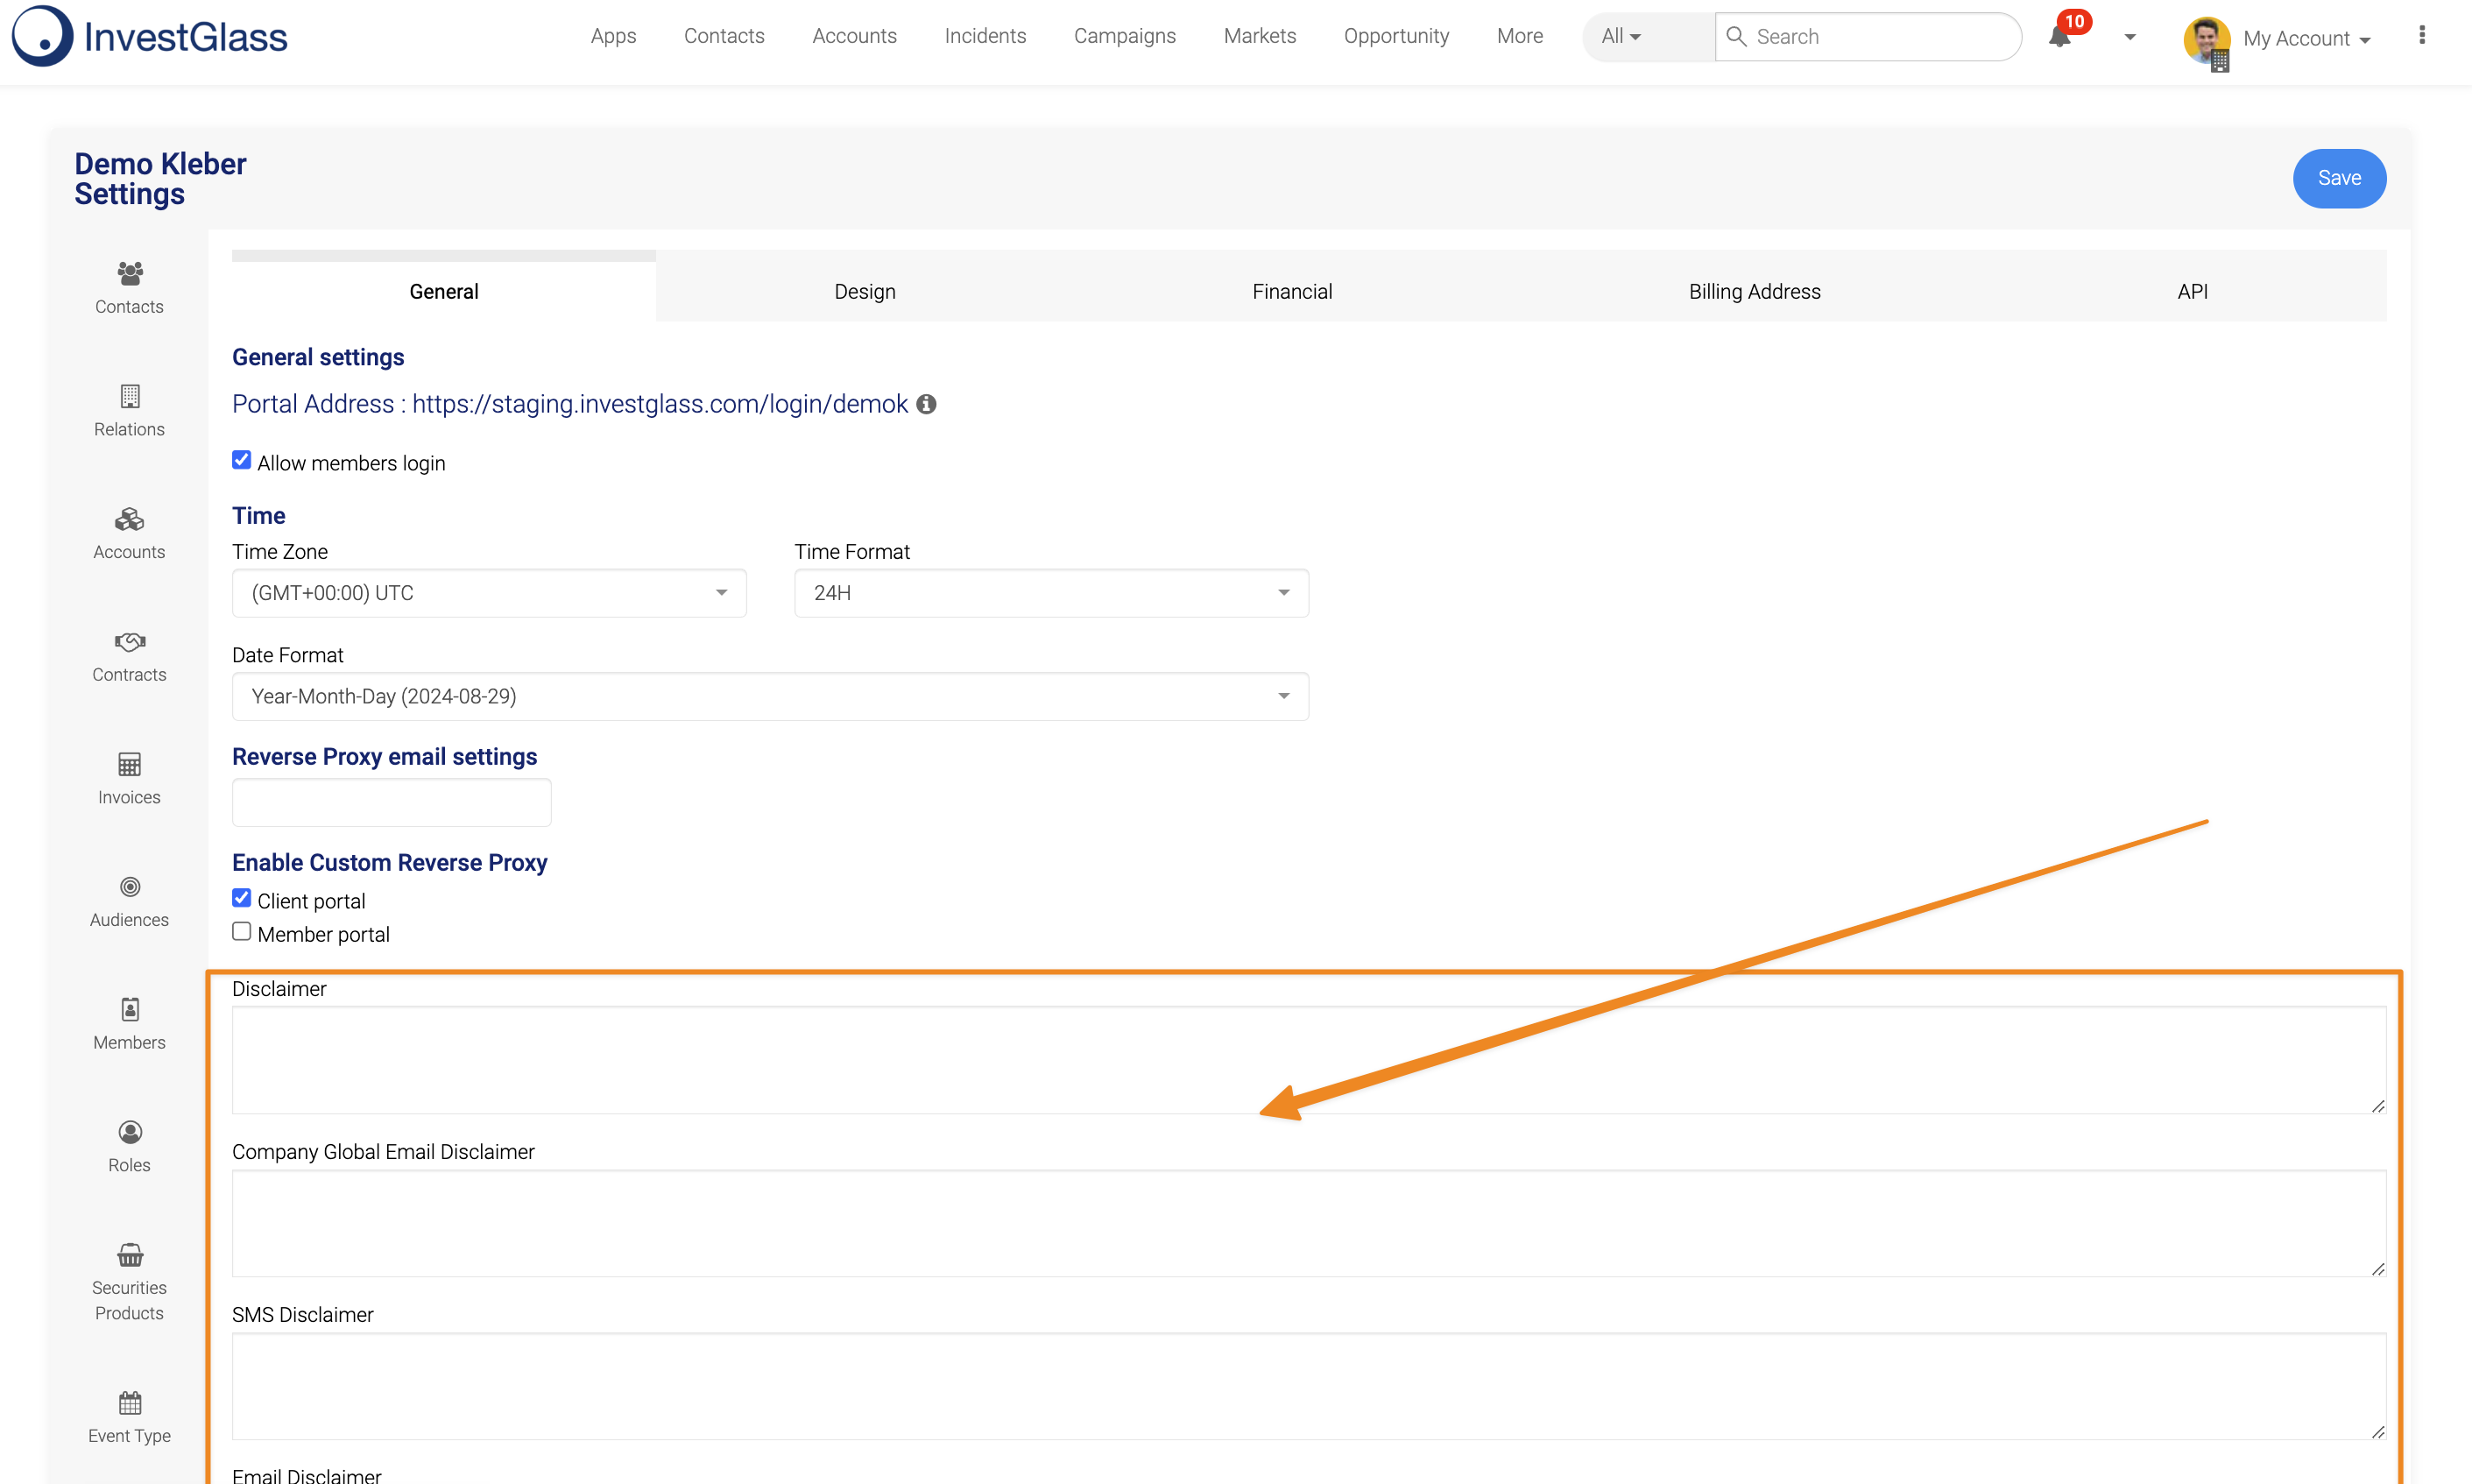
Your terms of service and disclaimer will be displayed to the client during the signature process via the client portal or public link. We'd like to encourage you to update these terms to keep them current and relevant.
- Go to My Account, then click on Company .
- On the left, scroll down and selectSettings.
- In the General tab, you will find the following elements that can be edited directly:
- Disclaimer
- Company Global Email Disclaimer
- SMS Disclaimer
- Email Disclaimer
- Footer
- Terms of Service
- Privacy Policy
Your setup is complete, and you're ready to send your first E-Signature request.
Updated 11 months ago
